
Android Studio2.1.2 のテンプレートGoogleMapsActivityの地図上に十字中心線を表示する簡単な方法。
その前に、Google Maps APIキーをセットしコンパイルすると
→ https://developer.android.com/studio/build/multidex.html?hl=ja
ということで
MyApplication\app\build.gradle
MyApplication\app\src\main\AndroidManifest.xml
ちなみに googleの巨大なライブラリを使う場合
MyApplication\gradle.properties
か
左ペインツリー Projectの Gradle Scripts/gradle.properties
で
VM起動オプション
本題の十字中心線は...▼
その前に、Google Maps APIキーをセットしコンパイルすると
Error:Execution failed for task ':app:transformClassesWithDexForDebug'.> com.android.build.api.transform.TransformException: com.android.ide.common.process.ProcessException: java.util.concurrent.ExecutionException: com.android.dex.DexIndexOverflowException: method ID not in [0, 0xffff]: 65536メソッド数の上限を超えた(Building Apps with Over 65K Methods)
→ https://developer.android.com/studio/build/multidex.html?hl=ja
ということで
MyApplication\app\build.gradle
apply plugin: 'com.android.application'

android {
    compileSdkVersion 24
    buildToolsVersion "23.0.3"

    defaultConfig {
        applicationId "asia.remix.map"
        minSdkVersion 10
        targetSdkVersion 24
        versionCode 1
        versionName "1.0"
        multiDexEnabled true ★追加
    }
    buildTypes {
        release {
            minifyEnabled false
            proguardFiles getDefaultProguardFile('proguard-android.txt'), 'proguard-rules.pro'
        }
    }
}

dependencies {
    compile fileTree(include: ['*.jar'], dir: 'libs')
    testCompile 'junit:junit:4.12'
    compile 'com.android.support:appcompat-v7:24.1.1'
    compile 'com.google.android.gms:play-services:9.4.0'
}
と
MyApplication\app\src\main\AndroidManifest.xml
<?xml version="1.0" encoding="utf-8"?>
<manifest package="example.myapplication"
          xmlns:android="http://schemas.android.com/apk/res/android"
    >

    <!--
         The ACCESS_COARSE/FINE_LOCATION permissions are not required to use
         Google Maps Android API v2, but you must specify either coarse or fine
         location permissions for the 'MyLocation' functionality.
    -->
    <uses-permission android:name="android.permission.ACCESS_FINE_LOCATION"/>

    <application
        android:allowBackup="true"
        android:icon="@mipmap/ic_launcher"
        android:label="@string/app_name"
        android:supportsRtl="true"
        android:theme="@style/AppTheme"
        android:name="android.support.multidex.MultiDexApplication" ★追加
    >

        <!--
             The API key for Google Maps-based APIs is defined as a string resource.
             (See the file "res/values/google_maps_api.xml").
             Note that the API key is linked to the encryption key used to sign the APK.
             You need a different API key for each encryption key, including the release key that is used to
             sign the APK for publishing.
             You can define the keys for the debug and release targets in src/debug/ and src/release/.
        -->
        <meta-data
            android:name="com.google.android.geo.API_KEY"
            android:value="@string/google_maps_key"
            />

        <activity
            android:name=".MapsActivity"
            android:label="@string/title_activity_maps"
            >
            <intent-filter>
                <action android:name="android.intent.action.MAIN"/>

                <category android:name="android.intent.category.LAUNCHER"/>
            </intent-filter>
        </activity>
    </application>

</manifest>
それぞれ ★印の行を追加。
ちなみに googleの巨大なライブラリを使う場合
MyApplication\gradle.properties
か
左ペインツリー Projectの Gradle Scripts/gradle.properties
で
VM起動オプション
org.gradle.jvmargs=-Xmx2048mを指定するとメモリ不足解消とコンパイル時間を短縮(約1/10)。
本題の十字中心線は...▼
背景が透明の好みのマークを中央に配置するのが簡単。
MyApplication\app\src\main\res\drawable
に 例えば cross.png

みたいな画像を作成し
activity_maps.xml
★<RelativeLayout
★    xmlns:android="http://schemas.android.com/apk/res/android"
★    xmlns:map="http://schemas.android.com/apk/res-auto"
★    xmlns:tools="http://schemas.android.com/tools"
★    android:layout_width="match_parent"
★    android:layout_height="match_parent"
★    tools:context=".MapsActivity">
★
    <fragment
        android:id="@+id/map"
        android:name="com.google.android.gms.maps.SupportMapFragment"
        xmlns:android="http://schemas.android.com/apk/res/android"
        xmlns:map="http://schemas.android.com/apk/res-auto"
        xmlns:tools="http://schemas.android.com/tools"
        android:layout_width="match_parent"
        android:layout_height="match_parent"
        tools:context="asia.remix.myapplication.MapsActivity"/>
★
★    <ImageView
★        android:layout_width="wrap_content"
★        android:layout_height="wrap_content"
★        android:text="center"
★        android:layout_centerInParent="true"
★
★        android:layout_centerVertical="true"
★        android:layout_centerHorizontal="true"
★        android:src="@drawable/cross"
★    />
★</RelativeLayout>
とするだけで
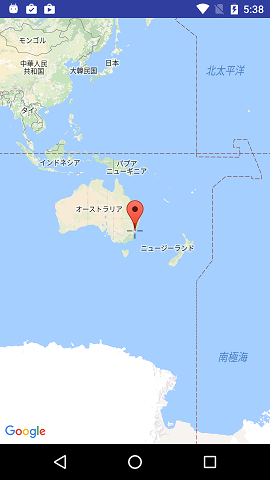
こんな具合に。